So, your wedding is fast approaching and you want memories that will last a lifetime. However, you are on a budget and don't have a lot of money to spend for a professional wedding photographer. You can still get professional-looking, creative, memorable pictures with DIY wedding photography.
The first thing to do is to find someone who takes great pictures. This doesn't have to do be a professional photographer. Many people have a "great eye" and instinctively know how to take great pictures. Think of friends or family members who you've complimented on their photography from vacations, for example. Another way to find a cheap wedding photographer is to look on local college bulletin boards, or post on them yourself in the art department or photography department. Many students have amazing talent, but since they are still a bit inexperienced, will be your wedding photographer for a fraction of the price of a professional wedding photographer. Some may even photograph your wedding for free, for no more than a free meal and use of your wedding pictures for their portfolio. You can also consider putting an ad on Craigslist for a hobbyist who is not a professional wedding photographer, but has an artistic eye and loves to take pictures. Get samples of work and negotiate a price you are both pleased with.
Whether you use a talented stranger or an artistically-inclined friend or family member as your wedding photographer, make sure they have a good camera. You may even consider purchasing a good quality, digital camera that you can give them as their "payment". If you need to purchase a camera for your DIY wedding photography, make sure you give it to the wedding photographer in plenty of time for them to learn the ins and outs of the camera, so they can adjust the settings. Digital cameras also allow for easy editing, so you or your DIY wedding photographer can edit your wedding pictures. Also, digital cameras have a large capacity to store many pictures, with a memory card they can hold hundreds of pictures, so you will have plenty of wedding photos to choose from to preserve your special day.
Another idea is to meet with your DIY wedding photographer to develop a plan of what you want photographed. Remember, since you will be saving a lot of money by not hiring a professional wedding photographer, you will have to do some of the work yourself. This includes providing the DIY wedding photographer with a list of what you want photographed. This may include photographs of the wedding rings, the wedding invitations, the bridal party, the groomsmen, the family of the bride, the family of the groom, the bride and groom's first kiss, the wedding service, etc. This will help you and your DIY wedding photographer be on the same page and know each other's expectations beforehand, so you get exactly what you want on your special day.
Also, encourage others to take pictures of your wedding. Some of the best wedding photography are those wonderfully candid moments caught by some of the guests. Some wedding couples choose to put disposable cameras on tables for guests to take photographs of, then ask that they leave the cameras when they leave the wedding reception. Some give the cameras out as wedding favors and ask that any great wedding photographs be sent to the married couple.
Lastly, consider the best of both worlds. You can hire a professional wedding photographer for a short period of time to take a few very specific pictures, then rely on your DIY photographer and wedding guests to take the rest of the photographs. This will eliminate a lot of cost for a professional wedding photographer. You can also opt to don your wedding attire a few days after the event and go to a studio to have a few professional pictures taken.
Remember, it doesn't take a professional photographer to take some amazing, creative, professional-looking wedding photography. Have a great day!
Wednesday, March 16, 2011
DIY Wedding Photography on a Budget
Enjoy an Art Museum, Docent Tour, and Lunch in a Day Trip
It is an excuse for a tasty lunch. We justify the true goal of the day, trying a new (to us) restaurant, with the appearance of culture. Living in the suburbs of Dallas, it is not a huge ordeal to trek into the city and enjoy the resources available to us. Even better, we will share a simple stress free outing with you.
Sleep in on a Saturday morning, since the Dallas Museum of Art does not open until eleven. Knowing a decent lunch awaits, we curtail our breakfast bounty and read the paper curled around a bowl of cereal. It is a gorgeous clear, sunny day with a hint of fall in the air. Dressed in sturdy walking shoes and casual wear, we drive the twenty miles into the city. Downtown Dallas on a Saturday morning is not teeming with life. The Arts District off of Pearl Street is just waking up and we easily find a meter to plunk in a few quarters. It is silly to pay the full day parking lot rate, when we plan to browse and then bolt for lunch.
There are some families and students waiting for the doors to open and we join the group to pay the ten dollars admission fee. We find our name on the docent tour list and end up with a private tour. Now, the docent tour was a bit of a bonus. My friend had won a silent auction bid a year ago and the tour was expiring. Even with a month's notice, friends and family were too busy to join in the festivities. Hence, it was the two of us. The docent tours can be arranged privately or there is a free public tour at two o'clock daily.
The tour is a pleasant surprise and gives us a new perspective of the museum. Rather than a seemingly random hodge-podge of art, there is a flow to the building and the docent guides us to a starting point upstairs. As we walk up the steps we enjoy the glass sculpture in the window of the art café. Flowers or sea creature creations, the bright glass glistens and allows the imagination to wander. An added bonus from the second floor is a view into the Nasher Sculpture Center next door. This is a year old cultural coup for the city of Dallas. Raymond Nasher donated his collection to the city, as well as actively participating in the building and presentation of his sculptures. The Nasher Center is a possible side trip depending on your art ambition for a day.
Our docent begins in the early American galleries and proceeds to stop and discuss various favorites and newly acquired pieces. As we proceed, we get a mixture of opinion, art history, and technique. With a different view and some lively discussion, we enjoy our stroll through the Dallas art galleries. We sit in front of Frederick Church's The Iceberg to rest our feet. The Dallas Museum of Art has a wide-ranging collection from American to African art, from classical to modern. A few hours here can enlighten young minds or invigorate the old. Constantly changing and rearranging the art on the walls, the museum wants you to return to see old favorites in new settings or to enjoy new works. It is easy to take the museum for granted, but an occasional visit is refreshing.
After two hours, we thank our guide and proceed to lunch. A short drive from the arts district, McKinney Avenue offers a variety of funky stores, trendy clubs, and fabulous eateries. We head to Cretia's on McKinney , a bistro and bakery. At one in the afternoon it has a decent crowd, and with the gorgeous weather, the patio seating is full of patrons. The menu does not disappoint with choice of lunch or weekend brunch items. We chose the chicken croissant sandwich and the hot roast beef sandwich. The lunches come with salad choices, fries, or fruits. Save room for dessert because the bakery section of this establishment is wonderful. We savored carrot cake with real cream cheese frosting and a red velvet cheesecake that was melt- in- the mouth delicious. Cretia's proves to be an enjoyable reward for our dose of art culture.
To burn off a few calories, we finish the afternoon with a stroll up McKinney to the Knox shopping area. Unique specialty shops and popular stores such as Pottery Barn and Crate and Barrel line the streets. Shop, people watch, or plan the next outing complete with a restaurant choice on McKinney. This is one little section of Dallas and the Dallas Museum of Art is only one of many museums to see. Take the time to enjoy some art and lunch.
Dallas Museum of Art Arts District
Cretia's 4438 McKinney Ave Dallas Texas 75205
Quick Art Pieces You Can Do - Even If You're Not an Artist

source
Art is in the eye of the beholder, so to speak - and art takes many forms - from beautiful hand-painted pieces of intense imagination, or chunky-looking piles of junk that make you scratch your head and wonder. If you’re in need of some nice artwork on your walls, you’re no artist, and you definitely don’t have the funds to go shopping for expense artwork, make some yourself. You don’t have to be an artist to do so. Just use a few things around your house and a couple of things from a craft store. And, your art pieces will be so wonderful yet no one will know how little they cost.
Blank canvases attached to wooden frames make a great base for your art. Use foam or regular brushes and make horizontal swipes, allowing ridges to build from brush marks, and minor drips to remain. These wide stripes, in various colors, can represent everything from a sea scape to a field of flowers.
An example is a beach scene made wide, white stripes across the top of the canvas then wide, blue stripes across the bottom. Switch to a smaller brush and make some white stripes, without much pressure on the brush, across the blue section. You can add a yellow circle in one corner, if you wish, but don’t make it too distinctive. Foam brushes allow you to circle the paint without adding much detail.
An example of a field of flowers requires a blue strip across the top third of the canvas, with strips of white included, if desired, then a very wide strip of green across the bottom. Now use a small brush to dot your favorite color of flowers across the green stripe. The flowers don’t have to have to be all the same color, and can overlap each other, too. This gives the effect of one standing in front of the other.
Use these techniques to make many different scenes, such as beach, cornfield, field of flowers, pond with ducks, row of houses, group of kids, and other images. After you get the color on the canvas, add your own real touches, such as a small group of silk daisies, along with a few sprigs of greenery, glued horizontally across the bottom of the canvas. For a beach scene you can glue on shells or even use glue and sand to enhance the design.
Mirrored wall designs are often considered art pieces particularly if they’re arranged in a unique and modern way. Mirrors without frames, but with beveled sides, make the best artwork pieces. Purchase one large mirror, then several smaller ones to start the project. You’ll also need small wooden dowel pieces, of various lengths, from an inch to three inches.
Paint the wooden pegs silver or gold. Hang the large mirror on the wall. Glue two to four of the pegs onto the back of each smaller mirror with contact cement, then attach the smaller mirrors onto the large one. The arrangement is your own, but here are some suggestions: Place one of the mirrors in the top corner, with part of the smaller mirror rising above the large mirror, and the other part of the mirror attached. Add a second mirror, in the same manner, placing it below and to the right of the first small mirror. Position the second mirror to where it extends out slightly past the large mirror. Use different sized pegs for each small mirror to get an even different effect. There are zillions of these mirror designs you can do, combining large, medium, and smaller mirrors attached to each other, some separated, or scattered across the entire wall.
Copper or foil, found on a roll at craft stores, can be used along with stencils to create some unique and beautiful shapes. Choose nice frames and mats then center the copper or foil design in the frame. Make several shapes and arrange them inside of the frame in a design that suits your style. Attach one of the copper or foil shapes to the outside of the frame to add to the beauty of the design. These wall hangings look expensive but aren’t.
Use inexpensive, small slabs of wood and rub-on transfers to make various art pieces for your home. Or, cut out slick magazine pictures of flowers, an old barn, or another image that catches your eye. For a rustic look, slightly burn the edges of the picture before mounting it on the wooden piece. Use the pieces in a manner as the mirrors, or hang them separately across the top of a mantel. The wooden slabs come in any number of sizes, shapes and colors.
There are many ways of making quick art pieces even if you’re not an artist. Combine things that interest you, and fit into your color scheme, and use your own style to create any number of beautiful pieces for your home. You’ll have fun with these projects because if it pleases you, it’s art!
Friday, March 4, 2011
Free Baby Products and Coupons for New Parents

baby clothes onsies
When I was pregnant with my first child, another mother advised me to sign up for newsletters and other mailings from companies that sell baby products. Later that day, I signed online and joined just about everyone mailing list I could find for baby care products. To be honest, I expect booklets and tips on how to successfully raise a child, but I received tons of samples and coupons for baby formula, food, diapers, and much more. I joined many of these mailing lists before my daughter was even born and over eighteen months later I am still receiving valuable coupons in the mail.
Below is a quick summary and list of company websites that may provide new mothers with coupons and sometimes products. On most questionnaires, you will have to enter in your name, age, address, information about your pregnancy, and your child's birth date or expected due date. It is important to enter in the correct information pertaining to your child's birth because many of these companies will send you coupons pertaining to the stage they are currently in.
Pampers is one of the most well known diaper brands among parents. Their website is at www.pampers.com. When you first arrive at their web page, you will be required to select your country and once you arrive on the following page, click on the link that mentions free coupons and samples. To join the Pampers Club, you must also pick a sign on name and password information. When my daughter was younger, Pampers would constantly send me coupons for baby wipes and diapers. Whenever she reached a new stage, Pampers would also include a sample diaper to try. Pampers is still sending coupons to my home and they generally arrive once a month.
One of the other well known diapers brands is Huggies. In addition to diapers and baby wipes, Huggies also has a line of bath care products for infants and toddlers. The company website is www.huggies.com. When you arrive at this web page, you will also have to select your country and when on the next page, select the "Happy Baby" link. Once you are in that section, select the tab at the top of the page labeled "Special Offers." When you are joining the Huggies mailing list, you will have to create a website screen name and password, allowing for easy return to the site. I generally receive coupons from Huggies about once every one or two months. Huggies will also send coupons for all of their products and they try and correspond them with your child's age.
Nestle produces various different types of baby formulas. The Nestle brand formula is formally known as Carnation. My daughter always had the Nestle Good Start Supreme formula and luckily Nestle is one of the best formula companies to receive samples and coupons from. Their company web page is http://www.verybestbaby.com. On their main page, you must sign up for the very best baby collection. Before my daughter even arrived, I had a free normal size can of Nestle Good Start formula. Later on I received a free baby book with stickers and tons of checks for formula. Nestle sends checks that are similar to coupons; however, they have your name on them and are good for formula at any retail store that sells it. The first three checks that I received actually covered one normal size can of formal from Nestle, you can't beat free formula! As your child develops the check size will decrease and when the standard child is off of baby formula, you will no longer receive mailings from Nestle.
When your infant is ready for baby food, Gerber and Beechnut are popular brands that many parents purchase. By visiting www.beechnut.com, parents can often times receive a free product from joining their newsletters and there are sometimes coupons to print off their website. With many supermarkets choosing to no longer accept printed internet coupons, www.gerber.com is the way to go. Gerber offers healthy baby food for children, finger foods for infants and toddlers, and Gerber Graduate Meals for toddlers. When you arrive at Gerber's home page, select the special offers tab. Once there, you must join the Growing Up Gerber plan. You will have to select a sign in name and password. To receive coupons, you will also be required to enter information about yourself and your child. If you wish to only receive coupons via postal mail, then you must check that box. I am still receiving coupons from Gerber and have been for over a year now. Each coupon specifically pertains to your child's age; therefore, make sure you enter in their correct birth date.
There are many companies that offer products relating to infants and toddlers, it is recommend that you check out each site and see what they have to offer. Raising a child can be very expensive, get a little help and receive coupons from companies whose products will come in useful to your and your new baby.
Sunday, February 27, 2011
Upgrade Your Digital Photography Studio on a Budget

Photo Credit: celtics baby clothes
Digital photography is progressing almost as fast as the computer industry. Mega-pixels are multiplying faster than you can count them. As with all advances in technology, a higher price tag is attached. So, how do you upgrade your digital photography studio with out breaking your budget?
Let's go over a few ways to do just that.
Upgrade your Digital Photography Studio - Don't Buy New
The more mega pixels the better, I know. But, if you are using a 5.0 mega pixel camera now, wouldn't a 6.0 one be an upgrade? There is no need to spend the extra $3000 to get the newest 10 mega pixel digital camera.
There are plenty of used camera stores to find newer equipment that will fit your budget as well. KEH offers a huge selection of both new and used digital camera equipment, all of which has been cleaned and tested.
Let's not forget about eBay either. The deals there on new equipment are sometimes better then buying older used equipment. You never know when some college kid is going to sell off his $3000 digital camera just so he can make rent.
Upgrade your Digital Photography Studio - Compensatory Upgrades
Find way to stream line your business. Odds are, you don't have a lot of people working at your digital photography studio. So, you probably wont be buying equipment that saves you money by eliminating workers. Still, there is always new software coming out to help you stream line your business.
Such software may be expensive at first, but will be worth the price. Even if the software does nothing more than free up two hours in your work day, that is two more hours to make money. That is two more hours to see customers. Those customers could then turn into lifetime customers who bring your repeat business and great word of mouth advertising. All because you freed up two hours in your work day.
Upgrade your Digital Photography Studio - Upgrade Only What You Need
Upgrading your digital photography studio doesn't mean you have to spend a fortune on new gear, lights, printers, computers, and what have you. Take some time to really identify what it is in your digital photography studio that needs to be upgraded.
Lets say you bought an expensive sub dye printer years ago to start printing photographs in house. 60,000 prints later, it's just not what it used to be. This doesn't mean you have fork over a huge amount of money to buy a new one. You could out source your printing for a while or you could even look into getting the printer refurbished by the manufacturer.
Upgrade your Digital Photography Studio - Upgrade Your Staff
Not every digital photography studio upgrade is a piece of expensive new gear. Invest some of your budget by training your staff. If you have other photographers working for you, try spending some money on a training workshop. The more your employees know about their job, the better they are at it. These workshops will help increase your staffs skills, but it will also help them get a better picture of what you want. Being on the same wavelength with your employees will also help them operate more efficiently
If you have complicated software programs, consider having a sales rep come out and teach your staff about the software. This goes back the same point, the more your employees know, the better they operate. Often, sales reps will be more than happy to come out and teach refresher courses or how to use new programs free of charge. After all, the happier you are with their product, the more you will buy from them in the future.
These are just a few ways to upgrade your digital photography studio with out breaking your budget. There are always ways to pinch pennies if you think about. The biggest obstacle to get over is the, must have the new stuff, mentality. You almost never need the new stuff, it is almost certainly nothing more than a want. Think before you buy and you are sure to save money in the now and make more in the future.
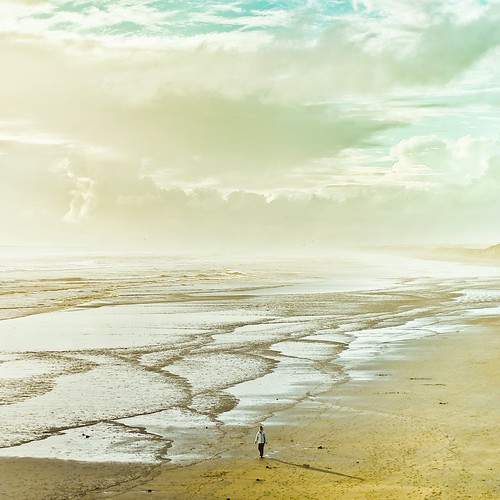
DIY Wedding Photography: Shot List for the Traditional Couple
photo source
How can you save money on photography for your wedding? Do it yourself! DIY wedding photos won't sacrifice your precious wedding memories. Just make sure you are doing the wedding justice by creating a shot list before the ceremony.
As a traditional couple, you will want "classic" wedding portraits. Make sure you get the following shots for your do it yourself wedding album.
DIY Wedding Photo Shot List - Pictures of the Bride and Groom
Have the bride and groom stand in front of the church. Stand back from the couple so you can get their entire bodies into frame. Make sure to get the entire wedding gown in the picture.
Take a few steps forward, use your zoom, and take a close-up portrait of the bride and groom facing forward.
Have the bride and groom turn their heads and look into one another's eyes. Take a close-up.
Snap a photo of the bride and groom standing in front of the church on their wedding day.
DIY Wedding Photo Shot List - Photos of the Wedding Party
Every wedding album needs a picture that includes the entire wedding party. Line up the bridesmaids and groomsmen with the bride and groom in the center. The flower girl and ring bearer can stand in front of the attendants, but do not place them directly in front of the bride and groom. Doing so would block the bride's wedding gown.
Take some wedding photos of the bride with her bridesmaids. Then take some pictures of the groom with his groomsmen.
Make sure you get a picture of just the flower girl and ring bearer. These cute wedding photos will turn out great!
DIY Wedding Photo Shot List - Pictures of Family Members
Family plays an important role in any wedding. Make sure to include them in the wedding photographs.
Shoot the bride with her family and the groom with his family. Marriage unites these two families, so get a shot of them all together as well.
Make sure to get a picture with the grandparents as well.
DIY Wedding Photo Shot List - Photographs of The Ceremony
The ceremony is the most sacred part of the wedding. Don't be too intrusive while getting your shots. Here are some wedding photos you must get:
Each bridesmaid and groomsmen as they walk toward the altar
The flower girl and ring bearer as they walk down the aisle
The bride walking down the aisle and being given away
Close-up of the groom when he sees his bride
The bride and groom standing at the altar (from behind and from in front if you can manage)
The entire wedding party during the ceremony
Bride and groom's first kiss as a married couple
The couple lighting the unity candle
Bride and groom exchanging rings
Bride, groom, and attendants as they walk back down the aisle
DIY Wedding Photo Shot List - Reception Photos
The reception offers many opportunities to capture the spirit of celebration. Take a lot of journalistic style photographs during the reception of guests dancing, eating, and laughing.
In addition to these spontaneous photos, remember to snap the following pictures:
The bride, groom, and attendants in the receiving line
Groom removing and tossing the bride's garter
Bride tossing her bouquet
The wedding cake being cut and fed to the bride and groom (protect your camera from flying cake!)
The couple's first dance and dancing with their parents
The Most Important Tip for DIY Wedding Photography - Be Creative
This wedding photography shot list will get you started. It is not intended to limit your creativity. These are only the basic poses and wedding pictures a traditional couple would like to have in their wedding photo album. Take these basics and add your own ideas to create a unique wedding gift -- the gift of memories.
Sources
DFM Photography, Wedding Shotlist Helper, http://www.dfmphotography.com/wedding_shotlist.shtml
Personal Experience
Saturday, February 26, 2011
Six Tips to Help You Clean and Organize Your Photography Studio

credit,credit
1. Photography Studio Organization - Use good old fashion hanging files.
Believe it or not, in this digital age, the classic green hanging folder is still a great organization tool. Using manila folders to organize your photography studio's bills, invoices, and receipts is a good start. It is a lost cause however, if you don't have an organized place to put them. The hanging folder is the perfect place to put them
Don't have a filing cabinet to put the hanging folders in? Not a problem. There are several options available at your local retail store. I prefer the clear Rubbermaid bins. They are about 8 inches wide. This means they are easily stored in closets or on a bookshelf. Since photography studio space is usually valuable real estate, these smaller file boxes might be the way to go.
2. Photography Studio Organization - File your files
A great way to keep your files organized is to keep a file of all your files. What do I mean by this? Keep a piece of paper in your photography studio with all of your file folders on with their names. If the folders have sub-folders, list those too.
This will let you see if you have folders that overlap so that you can condense your folders. For example, there is no point in having studio file and a studio equipment file.
You could have this list written on a piece of paper, but that would just be one more piece of paper to file. Try keeping this record in a word or excel document. That way you have one less piece of paper in your office and you can update it much easier when you add new folders and files.
3. Photography Studio Organization - Throw things away
For some reason most photography studio owners have a fear of throwing client paperwork and photos away. There are certain things that you just don't need to hang on to. If you are a digital photographer there is no reason to hold on to basic prints. Create a varity of back-ups and toss the prints. You can always re-print them. If you aren't a digital photographer and have a traditional photography studio, invest in a scanner. This way, if you must hold on to prints for color purposes, you can scan them and toss the print.
There are some things you need to hold onto though.
Tax items are one thing you should hold onto. You should save your tax returns forever. The rest of your tax reports and receipts should be saved for no longer than six years.
Throw away papers that you don't have an immediate need for, can get a copy of easy, or that don't have any tax or legal reason to hold on to.
If you feel like you need to hold on to all your photography studios paperwork, than try scanning it all onto a portable hard drive. Then you can throw all the papers away. It will take more time than growing through all the papers away, but at least the hard drive will take up less space in your office.
You can scan model's head shots for reference later. You can scan pose ideas from magazines so you don't have clipping all over your photography studio.
4. Photography Studio Organization - "Assorted" Folders
How many other, assorted, or misc files do you have in your photography studio? You know, the folder that you put everything in that you just don't know where else to put it. That isn't organization. Odds are you can just throw it away altogether. A good rule of thumb is, if you haven't needed it or touched it in a year then toss it.
5. Photography Studio Organization - Get rid of business cards
There are so many ways to organize all your business cards, model head shots, and contact information. There are plenty of ways to get rid of it altogether as well. A simple approach is to take the business card or headshot and tape it or staple it the file folder it is associated with. At least then it is filed away instead of in a pile on your desk or in a drawer.
There are lots of gadgets out there made for scanning in business cards to your computer. If you are a digital photography studio, you probably already have a scanner, put it to good use. If you don't have the money for one of these than just take some time to enter the contact information into your electronic address book. Outlook has a great address book or you could even use your email clients address book. Anything is better than having them just laying around waiting to get lost.
6. Photography Studio Organization - Use the computer
Try using your photography studio's computer as much as possible. Use it to make your to-do lists, create address books, file documents, and more. The more you keep or put into your computer the less you have in your photography studio.
As I mentioned before, there are plenty of gadgets out there that can help you scan your files into the computer. Take advantage of them!
Wildlife Photography: Tips to Learn the Basics of Wildlife Photography
credit
If you really want to learn the art of wildlife photography, then you should be aware of the basics of wildlife photography. It is rightly said that wildlife photography is one of the most challenging but rewarding hobby or career. It takes honest practice, persistence and hard work to master the real art of wildlife photography.
For mastering wildlife photography you have to have the basic knowledge of camera handling. As majority of the photos you take will be captured with the help of telephoto lens. This will test your patience and dedication as you have to wait a much longer time for the animal to come in the range and taking right pictures through right angles before that wild animal leaves from the site. Many of the times the animals you want to shoot will be yards away from you so that you have to take your pictures with more precision and care with zoom lenses.
While shooting wildlife you always have to watch out for minute movements happening around you. And for that purpose you have to be attentive for the longer time. The sunlight also plays a very important role in taking these wildlife pictures. For this purpose your camera should have the proper adjustments according to the various angles of sunlight so that pictures will be much clearer without any fuzz.
Also wildlife photography is all about capturing a particular moment of the wildlife. It makes or breaks your photography style. Many of the best wildlife photographers out there are really skillful in shooting the exact speed and momentum of the particular animal they are watching. But to be the best wildlife photographer out there you should first master the basics and you can begin this process by starting to shoot your own home pets. If you learn to shoot their natural movements and habits in their natural style then you can say that you are ready for outdoor wildlife photography.
There are no shortcuts to learn the basics of wildlife photography. Rather you have to practice it religiously and with full devotion. You should have to pay a special attention to your cameras. You have to take care that your camera has a quick shutter speed which is very necessary to take more than one shot as you roam around the wildlife to take pictures. In this type of photography most of the times you have to follow your subject to shoot many pictures at a time in one shot. This process is mainly known as "panning" which consists of taking faster pictures in one snap as you mover closer to a particular animal you want to shoot.
Thus wildlife photography is all about your patience, persistence and shooting skill where you need to wait a longer time to take the perfect picture. But at the end of the day it is also the most satisfying art where you get the really thrilling and enjoyable experience to cherish for.